Destructibles
Introduction
Example
destructibledef is provided in APE for a vehicle and implements the majority of the features of the destructible system that you can view and use as a template.
This page will explain destructibles and how you can set one up yourself. This includes the getting the basics down and then going deeper into how they work.
Destructibles, as the name implies, allow you to define destructible objects you can place in your map. They are generally used for destrucible vehicles that eventually explode after taking damage but can be used for almost anything that can be destroyed. For example you could make a wall that can be broken down, or windows that can be broken bit by bit.
Destructibles work off the concept of pieces. For the particular destructible definition it will have a number of pieces assigned to it. Each piece is then further broken down into states of destruction, which are hidden/shown by bones. Each state has a number of parameters you can set such as health or FX and animations that get played, which are explained further down.
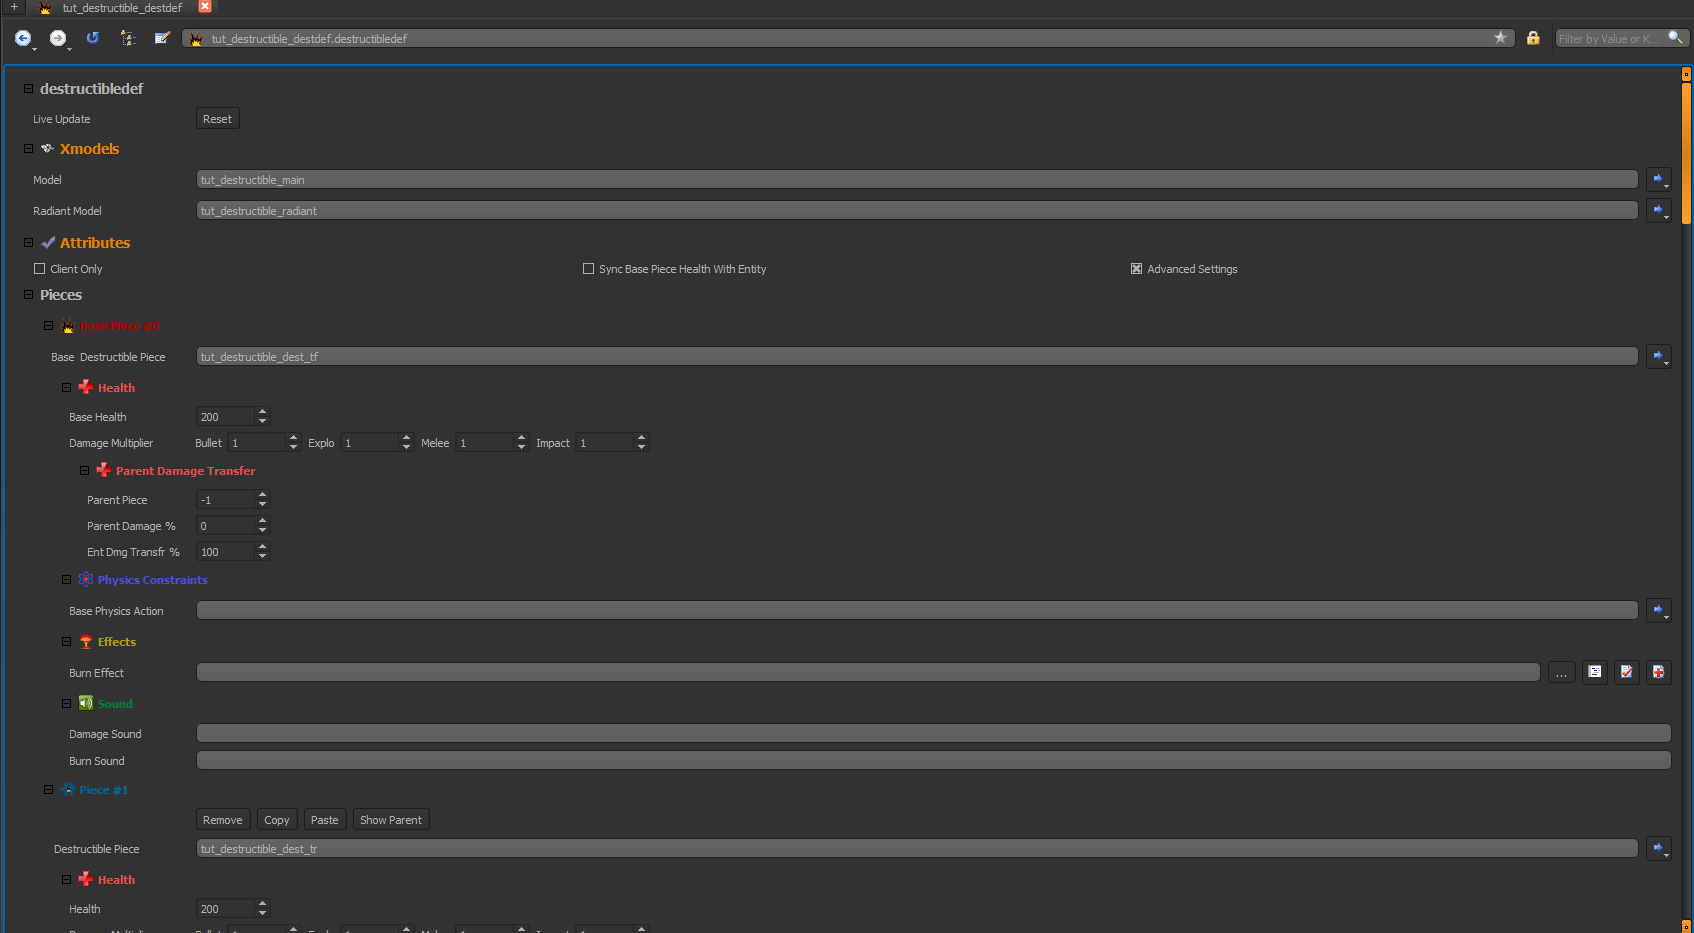
To start, we have 2 model entries:
- Model: This is the actual piece with all the different parts in full, this should contain all pieces and all possible states. In a lot of cases this model can appear messy as it has broken and clean states, etc.
- Radiant Model: This is the model that will show up in Radiant, it is not used in-game and is purely for visual purposes for use in Radiant. This is usually the model with just the clean state.
Limits
Pieces
As mentioned above each destructible def is broken down into pieces which define the different parts of a model that can be broken. A good way to determine what should be a piece in a particular model is to think of what would break off if you were to start shooting at an object, for a car, it might be its doors or wheels, for something like a door it would break down bit by bit.
Each piece is defined by the bone it is binded to, we will see once we get to states below how this is used to hide/show each pieces state.
For the main piece there are some global options we can set:
- Base Health: This the amount of health the piece starts off with and is gradually reduced as the piece takes damage, the states are then selected based off the percentage of health the piece has.
- Multipliers: These are basic multipliers you can set for difference damage types.
- Parent Options: This allows you to define a parent for this this piece and some parameters, useful for cases where you want damage to a piece to be taken into consideration for a piece it is connected to.
The Physics Constraint option is very useful, this can be used for cases such a car door that swings open when shot at.
Some Effect and Sound options can be set here as well, state specific asset options are explained below in more detail.
States
Each piece is broken down into states it can have which are hidden/shown based off the bone names provided.
The base state is considered the entry point for the piece and all other states are hidden while a particular state is active. Once enough damage has been dealth, the game moves onto the next state and any parameters set such as Break FX are executed. When a state is active all other states are hidden.
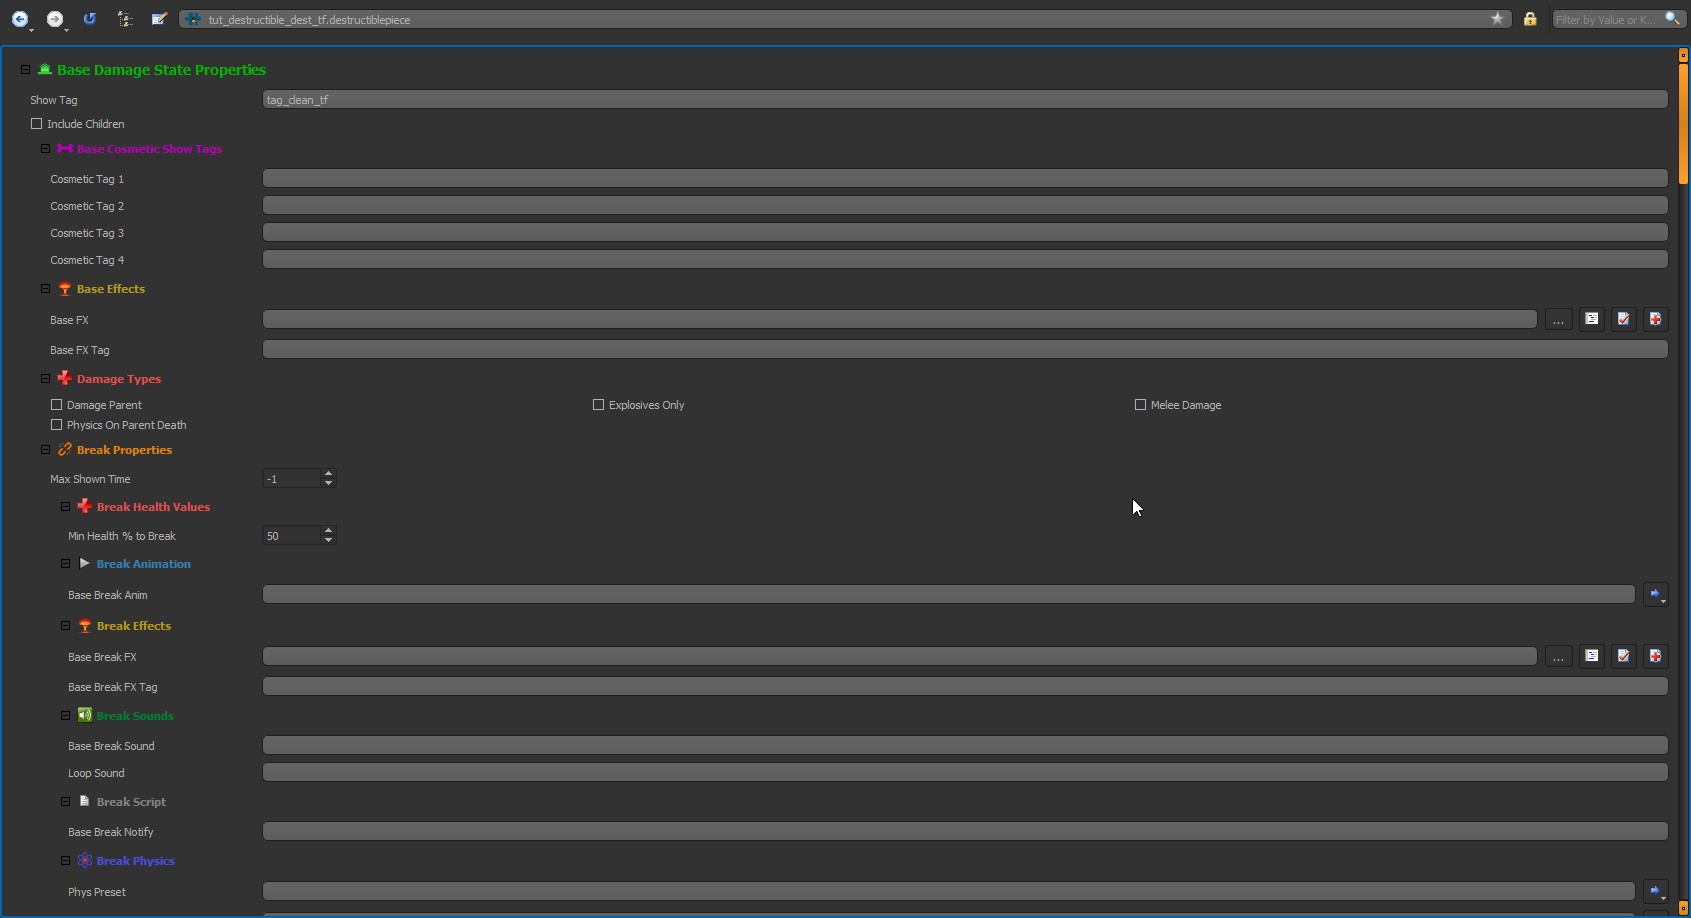
For a particular state, the following properties are provided:
- Show Tag: This is the bone/tag that is hidden/shown depending on if this state is active. Any meshes bound to this bone will be hidden when the state isn’t active. A checkbox below this: Include Children defines whether or not to include the bones that are children of this bone when hiding.
- Cosmetic Tag 1-4: These are extra bones/tags you can hide/show for cosmetic purposes.
- FX: This is the FX played while this state is active.
- FX Tag: This defines the bone/tag that the FX should be played on.
The Damage Types section provides some basic checkboxes for allowed damage types and parent parameters, these are:
- Damage Parent: This defines whether or not to push damage up to the parent piece when this piece gets damaged.
-
Explosives Only: This defines if only explosives can damage this piece. This is useful if you want a wall to only be destroyed by explosives for example.
- Max Show Time: This defines the maximum amount of time this state can be shown for, useful for cases where you have a car that is on fire and no matter what will eventually explode. If set to -1 the piece will show until it is destroyed by damage.
- Min Health % to Break: This the percentage of health based of the pieces health defined in the main destructibledef that is needed to break the piece at this state.
Finally we have parameters we can define for what should happen when the piece is broke/destroyed, this includes FX, Sounds, and even Animations and Physics:
- Break Anim: This is the animation that is played once this state breaks and moves to the next, this is useful for cases such as tires deflating or a hanged object.
- Break FX: This is the FX that is played once this state breaks and moves to the next, this is useful for cases such as a car catching fire.
- Break Sound: This is the name of the sound alias that is played once this state breaks and moves to the next, this is useful for changing the audio on a radio once it has been broken to distorted sounds.
- Loop Sound: This is the name of the sound alias that is played while this state is active, this is useful for playing a fire sound while a car is on fire.
- Break Notify: This is the notify that is sent to script. As mentioned above, destructibles are entities and can be accessed in GSC, passing a notify allows you to do more such as do damage to nearby actors and players when a car explodes.
- Phys Preset: This is the preset that is used for when this piece is breaks to define how the piece should respond to when broke, for example the antenna on a car flying off.
Understanding the states can seem overwhelming at first but generally they are quite easy to understand and once you do it is trivial to set them up.
Feedback
Was this page helpful?
Glad to hear it! Please tell us how we can improve.
Sorry to hear that. Please tell us how we can improve.